
How to Install a Timing Belt
2025-07-22
How to Install a Timing Belt?
The timing belt is a critical component in your engine, responsible for synchronizing the rotation of the crankshaft and camshaft(s) to ensure proper valve timing. A failed timing belt can lead to catastrophic engine damage, making proper installation essential. This guide will walk you through the process of installing a timing belt, complete with technical specifications and best practices.
Understanding the Importance of Timing Belt Installation
Before diving into the installation process, it’s crucial to grasp why proper timing belt installation matters. Most modern engines with interference designs (where valves and pistons occupy the same space at different times) will suffer severe damage if the timing belt breaks or slips. According to automotive engineering standards, a timing belt that’s even 3 degrees out of alignment can cause reduced engine performance, increased emissions, and potential valve-piston contact.
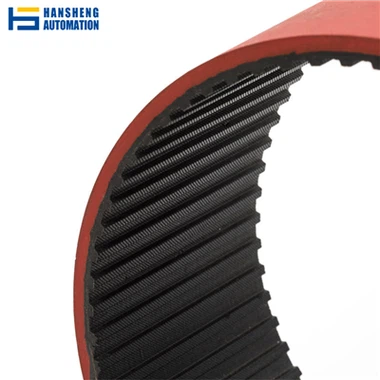
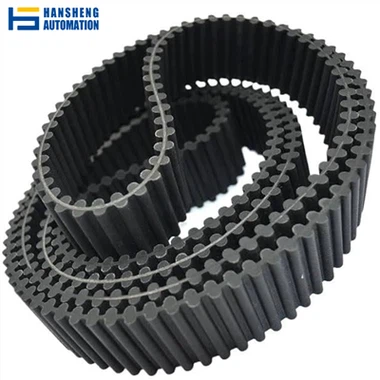
Timing belts are typically made from reinforced rubber with high-tensile fibers, designed to withstand temperatures up to 120°C (248°F) and rotational speeds exceeding 6,000 RPM. However, they degrade over time due to heat, oil contamination, and wear, which is why manufacturers recommend replacement intervals ranging from 60,000 to 100,000 miles (96,560 to 160,934 km), depending on the make and model.
Pre-Installation Preparation
Tools and Materials You’ll Need
Gathering the right tools and materials before starting is key to a smooth installation. Here’s a detailed list:
Essential Tools
- Socket set (metric and standard, typically 8mm to 19mm)
- Torque wrench (capable of measuring up to 100 N·m)
- Timing belt tension gauge (calibrated to measure 50-150 N of force)
- Camshaft and crankshaft locking tools (specific to your vehicle)
- Belt tensioner adjustment tool (varies by manufacturer)
- Screwdrivers (flathead and Phillips)
- Pry bar or belt tensioner release tool
- Feeler gauge (for measuring belt deflection)
- Wire brushes and cleaning solvent
Replacement Parts
- New timing belt (matching OEM specifications; check for part numbers like Gates T192 or Dayco 9527 for reference)
- Timing belt tensioner (spring-loaded or hydraulic, depending on the engine; preload specifications: 15-25 N)
- Idler pulleys (if worn; bearing tolerance should be less than 0.05mm axial play)
- Gasket sealant (high-temperature, rated for 200°C+)
Vehicle-Specific Research
Consult your vehicle’s service manual for exact specifications. For example:
- Toyota 2.4L 2AZ-FE engines require camshaft timing marks aligned with cylinder head notches
- Honda K24 engines use a crankshaft pulley keyway that must align with TDC on the timing chain cover
- Volkswagen 2.0T FSI engines have a hydraulic tensioner that needs priming before installation
Removing the Old Timing Belt
Disconnecting Power and Accessory Components
- Disconnect the negative battery terminal (10mm bolt, torque to 5-8 N·m when reinstalling)
- Remove the drive belt(s) using a tensioner tool (check belt tension: should deflect 10-15mm under 10kg force)
- Unbolt the timing belt cover (typically 4-6 bolts, 8-10mm size)
Aligning Timing Marks
- Rotate the crankshaft clockwise until the crankshaft timing mark aligns with TDC (0°) on the timing cover
-
- Use a breaker bar on the crankshaft pulley bolt (22-24mm) for leverage
-
- Never rotate counterclockwise as this can damage valves in interference engines
- Verify camshaft timing marks are aligned with their respective indicators
-
- Example: On a 4-cylinder engine, intake and exhaust cam marks may align with each other or with cylinder head benchmarks
-
- Use a straightedge across camshaft gears to ensure alignment if marks are unclear
Removing Tension and Old Belt
- Locate the timing belt tensioner (spring-loaded or hydraulic)
-
- For spring tensioners: Use a wrench to rotate the tensioner and release tension, then lock with a pin (if equipped)
-
- For hydraulic tensioners: Remove the tensioner bolt (12-14mm) and compress the piston in a vice until it locks
- Slide the old timing belt off the crankshaft gear, idlers, and camshaft gears
- Inspect related components:
-
- Tensioner pulley: Check for bearing noise or excessive play (>0.1mm is unacceptable)
-
- Water pump: Look for leaks around the seal; replace if more than 100,000 miles or 5 years old
-
- Oil seals: Replace crankshaft and camshaft seals if leaking (use seal installer tool to prevent damage)
Installing the New Timing Belt
Preparing New Components
- Clean all pulley surfaces with a lint-free cloth and solvent (avoid oil-based cleaners)
- Apply a thin layer of high-temperature grease to idler pulley bearings (NLGI #2 grade)
- If replacing the water pump, apply gasket sealant to both sides of the new gasket (bead size: 2-3mm)
Routing the New Belt
- Refer to the belt routing diagram in your service manual (usually printed on the timing cover or underhood sticker)
- Begin installation at the crankshaft gear, then route around idlers and tensioner, finishing with camshaft gears
-
- Ensure the belt is fully seated in all pulley grooves (no teeth hanging over)
-
- Maintain tension on the non-tensioner side of the belt during installation
Setting Tension
- For spring tensioners: Remove the locking pin and allow tensioner to contact the belt
- For hydraulic tensioners: Install the tensioner with the locked piston, then remove the locking pin
- Verify tension using a belt tension gauge:
-
- Proper tension: 50-70 Hz frequency (measured with a timing belt tension meter)
-
- Alternative method: Press the belt midway between two pulleys; deflection should be 5-7mm under 10N force
- Retighten tensioner mounting bolts to specification (typically 18-22 N·m)
Final Checks and Reassembly
Verifying Timing
- Rotate the crankshaft two full revolutions clockwise
- Recheck all timing marks – they should realign perfectly
-
- If not, repeat the installation process to avoid valve damage
- Inspect belt engagement: Each tooth should fully seat in pulley grooves with no gaps
Reinstalling Components
- Replace the timing belt cover (torque bolts to 8-12 N·m in a crisscross pattern)
- Reinstall drive belts and set proper tension (refer to earlier specification)
- Reconnect the negative battery terminal
Testing and Break-In
- Turn the ignition to ON (don’t start) to prime the fuel system
- Start the engine and let it idle for 5 minutes (no revving above 2,000 RPM)
- Listen for abnormal noises (rattling, ticking indicates misalignment or excessive tension)
- Check for leaks around the timing cover and water pump
- Test drive the vehicle under varying conditions:
-
- Idle (800-900 RPM)
-
- Acceleration through 3,000 RPM
-
- Deceleration
-
- No load cruising at 60 mph
Maintenance After Installation
- Record the installation date and mileage
- Check belt tension after 500 miles (800 km)
- Inspect timing cover for oil leaks monthly
- Plan next replacement based on manufacturer interval (typically 60,000-100,000 miles)
Proper timing belt installation requires precision and attention to detail. By following these steps and adhering to manufacturer specifications, you can ensure reliable engine performance and avoid costly repairs. Always err on the side of caution – if unsure about any step, consult a professional mechanic.
How to Inspect a Timing Belt
How to Tell If a Timing Belt Is Bad
Related Article

Gears are the backbone of mechanical transmission systems, converting rotational motion and torque between shafts to power everything from household appliances to industrial machinery.
What are the 4 types of gears

CNC machines (Computer Numerical Control machines) have transformed manufacturing by delivering unmatched precision, repeatability, and efficiency across material types—from metals to plastics and composites.
Which Industries Mostly Use CNC Machines

CNC machining is celebrated for its precision and versatility in shaping metals, plastics, and composites—but its subtractive nature (removing material from a solid workpiece to create parts) raises a critical question: “Is CNC machining wasteful?” At first glance, the piles of metal shavings, plastic chips, and scrapped parts from CNC operations might suggest yes.
Is CNC machining wasteful
