
How to Inspect a Timing Belt
2025-07-23
How to Inspect a Timing Belt?
The timing belt is one of the most critical components in your vehicle’s engine, yet it’s often overlooked until it fails. A malfunctioning timing belt can lead to catastrophic engine damage, costly repairs, and even leave you stranded on the road. Regular inspection is key to avoiding these issues, but many car owners aren’t sure how to properly check their timing belt. In this comprehensive guide, we’ll walk you through everything you need to know about inspecting a timing belt, from why it matters to the exact steps you should follow.
Why Inspecting Your Timing Belt Matters
Before diving into the inspection process, it’s essential to understand why this maintenance task is non-negotiable. The timing belt synchronizes the rotation of the crankshaft and camshaft, ensuring that the engine’s valves open and close at precisely the right time. If the belt slips or breaks, the valves and pistons can collide, resulting in bent valves, damaged pistons, or even a seized engine.
Unlike some other car parts, a failing timing belt often gives little to no warning before it fails. This is why manufacturers recommend specific intervals for inspection and replacement—typically every 60,000 to 100,000 miles, depending on the vehicle make and model. By inspecting your timing belt regularly, you can catch early signs of wear and avoid costly engine repairs.
Preparing for the Inspection: Tools and Safety
Before you start inspecting your timing belt, gather the necessary tools and take safety precautions to protect yourself and your vehicle.
Tools You’ll Need
- A socket set or wrench to remove the timing belt cover
- A flashlight to illuminate hard-to-see areas
- A pair of gloves to protect your hands from sharp edges
- A feeler gauge (optional) to check belt tension
- A camera or smartphone to take photos of the belt for reference (optional)
Safety First
- Ensure the engine is completely cool before starting. Working on a hot engine can cause burns.
- Disconnect the battery’s negative terminal to prevent accidental engine startup.
- Park your vehicle on a flat, level surface and engage the parking brake.
- Wear safety glasses to protect your eyes from debris.
Step-by-Step: How to Inspect a Timing Belt
Step 1: Locate the Timing Belt Cover
The timing belt is housed under a plastic or metal cover to protect it from dirt and debris. The cover is typically located at the front of the engine, near the crankshaft pulley. Consult your vehicle’s owner’s manual to find the exact location—some vehicles have multiple covers (upper and lower) that need to be removed.
Step 2: Remove the Timing Belt Cover
Using your socket set or wrench, carefully remove the bolts or clips holding the timing belt cover in place. Set the cover and bolts aside in a safe location to avoid losing them. Be gentle when removing the cover to prevent damaging any surrounding components, such as hoses or wiring.
Step 3: Visually Inspect the Timing Belt
With the cover removed, use your flashlight to examine the timing belt closely. Look for the following signs of wear or damage:
Cracks or Fraying
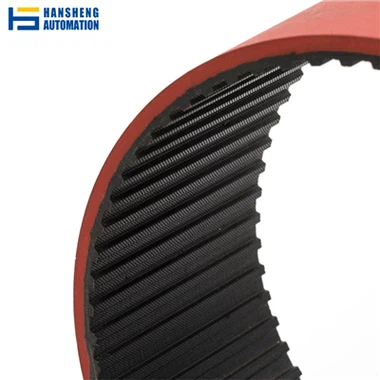
Check the surface of the belt for small cracks, especially on the ribs (the inner side that meshes with the pulleys). Even minor cracks can indicate that the belt is deteriorating. Fraying or splitting along the edges is also a red flag.
Glazing or Hardening
A healthy timing belt should feel slightly flexible. If the belt feels stiff, glossy, or “glazed” (shiny and hard), it may be drying out due to heat or age. Glazing reduces the belt’s ability to grip the pulleys, increasing the risk of slippage.
Wear on the Ribs
Inspect the ribs (the inner teeth) for signs of excessive wear. Look for missing chunks, uneven wear, or rounding of the rib edges. This can occur when the belt is misaligned or when the pulleys are worn.
Oil or Grease Contamination
If the timing belt is covered in oil or grease, it’s a sign of a leak from a nearby component (such as a camshaft seal or oil pump). Oil breaks down the belt’s rubber, causing it to deteriorate faster. Address the leak immediately, as a contaminated belt will need to be replaced.
Misalignment
Check if the belt is properly aligned with the pulleys. A misaligned belt may ride off-center on the pulleys, leading to uneven wear. Look for signs that the belt has rubbed against the cover or other components, such as scuff marks.
Step 4: Check the Tensioner and Pulleys
The timing belt’s tension is maintained by a tensioner, a spring-loaded or hydraulic device that keeps the belt tight. A faulty tensioner can cause the belt to slacken or become too tight, leading to premature wear.
- Tensioner Pulley: Spin the tensioner pulley by hand. It should rotate smoothly without wobbling or making a grinding noise. If it’s loose, noisy, or stuck, the tensioner may need to be replaced.
- Belt Tension: Press down on the middle of the belt with your finger. A properly tensioned belt should deflect about 1/2 inch (1.27 cm) under moderate pressure. If it’s too loose or too tight, adjust the tensioner (if possible) or replace it.
Step 5: Inspect Accessory Belts (Optional)
While you’re inspecting the timing belt, take a moment to check the accessory belts (e.g., serpentine belt, alternator belt). These belts are separate from the timing belt but can affect engine performance if worn. Look for similar signs of damage, such as cracks, fraying, or glazing.
Step 6: Reassemble the Components
Once you’ve completed the inspection, reattach the timing belt cover and tighten the bolts to the manufacturer’s specifications. Reconnect the battery’s negative terminal.
When to Replace the Timing Belt
Even if your timing belt passes the visual inspection, it’s important to replace it at the manufacturer-recommended interval. Most automakers suggest replacing the timing belt every 60,000 to 100,000 miles (or 5 to 7 years, whichever comes first). However, if you notice any of the following issues during your inspection, replace the belt immediately:
- Cracks, fraying, or significant wear
- Glazing or hardening
- Oil contamination
- Tensioner or pulley damage
- The belt is past its recommended replacement interval
When replacing the timing belt, it’s also wise to replace related components, such as the tensioner, idler pulleys, and water pump (if it’s driven by the timing belt). This prevents future failures and saves you from having to disassemble the engine again soon.
Common Mistakes to Avoid During Inspection
- Skipping the inspection: Many car owners wait until the belt fails, but regular checks can prevent breakdowns.
- Ignoring small cracks: Even minor cracks indicate the belt is weakening and should be replaced.
- Overlooking the tensioner: A faulty tensioner can damage a new belt, so always inspect it alongside the belt.
- Rushing the process: Take your time to thoroughly check every part of the belt and surrounding components.
Conclusion
Inspecting your timing belt is a simple yet crucial maintenance task that can save you from expensive engine repairs. By following these steps, you can identify early signs of wear and ensure your timing belt is in good condition. Remember, even a well-maintained belt has a limited lifespan—always follow your vehicle manufacturer’s guidelines for replacement. With regular checks and timely replacements, you’ll keep your engine running smoothly for years to come.
Is a Drive Belt the Same as a Timing Belt
How to Install a Timing Belt
Related Article

Gears are the backbone of mechanical transmission systems, converting rotational motion and torque between shafts to power everything from household appliances to industrial machinery.
What are the 4 types of gears

CNC machines (Computer Numerical Control machines) have transformed manufacturing by delivering unmatched precision, repeatability, and efficiency across material types—from metals to plastics and composites.
Which Industries Mostly Use CNC Machines

CNC machining is celebrated for its precision and versatility in shaping metals, plastics, and composites—but its subtractive nature (removing material from a solid workpiece to create parts) raises a critical question: “Is CNC machining wasteful?” At first glance, the piles of metal shavings, plastic chips, and scrapped parts from CNC operations might suggest yes.
Is CNC machining wasteful
